Installation Guide
You’re minutes away from improving the performance of your UpViral campaigns!

GOAL
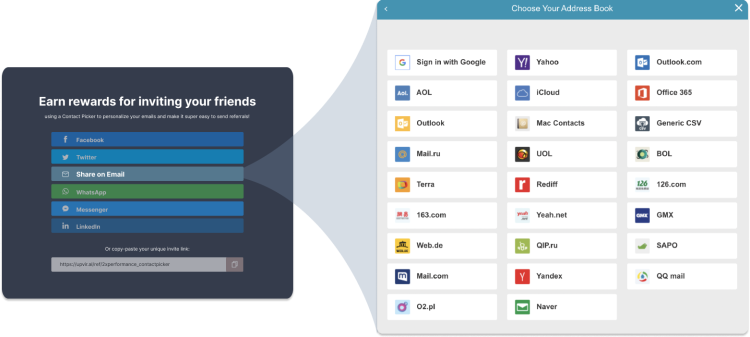
Modify the behaviour of the ‘Share on Email’ button to launch the Contact Picker instead of a Mailto link
to let users access email address books to refer via email.
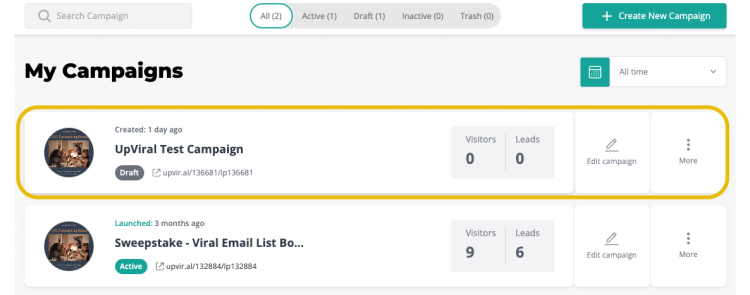
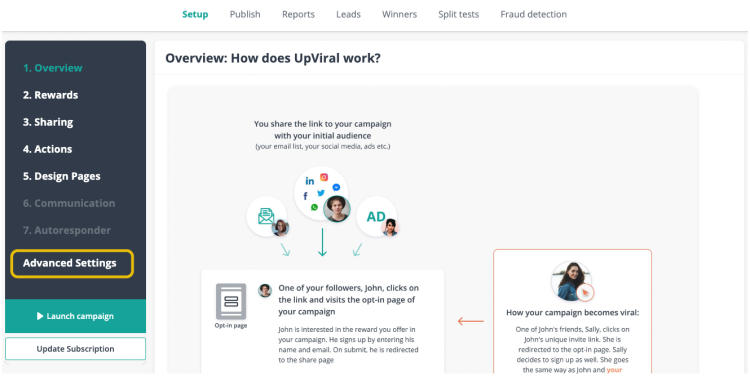
2 - Head to 'Advance Settings'
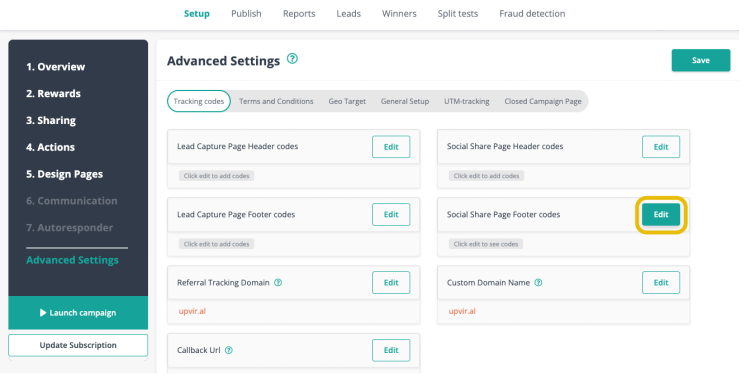
Once inside the campaign setup, redirect to ‘Advanced Settings’ on the left side menu.
3 - Edit 'Footer Codes'
Choose to edit “Social Share Page Footer codes” from the second column of options.
4 - Insert your CloudSponge key
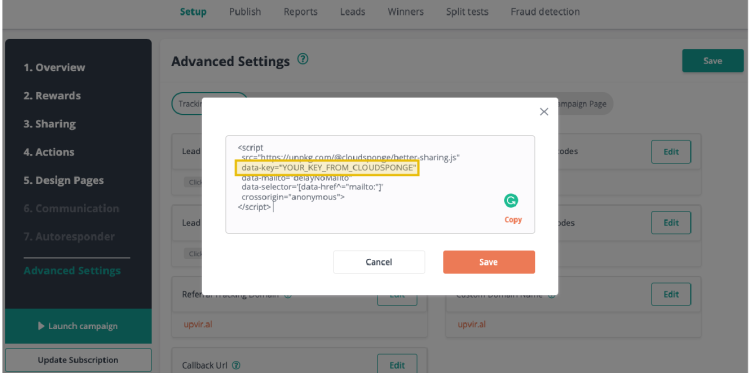
Once inside the campaign setup, redirect to ‘Advanced Settings’ on the left side menu.
<script
src=”https://unpkg.com/@cloudsponge/better-sharing.js“
data-key=”YOUR_KEY_FROM_CLOUDSPONGE“
data-selector=’[data-href^=”mailto:”]‘
data-view=”modal“
data-send-via=”mailto“
crossorigin=”anonymous“
></script>
Make sure to insert your CloudSponge license key as the data key attributes.
5 - All set!
Your CloudSponge Contact Picker installation is complete and ready to be used.
You can test it out by clicking the ‘Share on Email’ button in your UpViral campaign.
In its current setup – the Contact Picker will send out emails using your pre-existing Mailto or email protocol settings. If you’d like to use Zapier instead – see our playlist.
