tl;dr Here’s a quick checklist of what Google’s looking for when they ask for a demo video:
- record your video in your live production environment
- demonstrate your
client_idin the URL - show your consent request screen
- start the video where users launch the Contact Picker
- end the video after the Google contacts are in your system.
Read on to get the details about the hardest parts (showing your client_id and forcing the request screen to show).
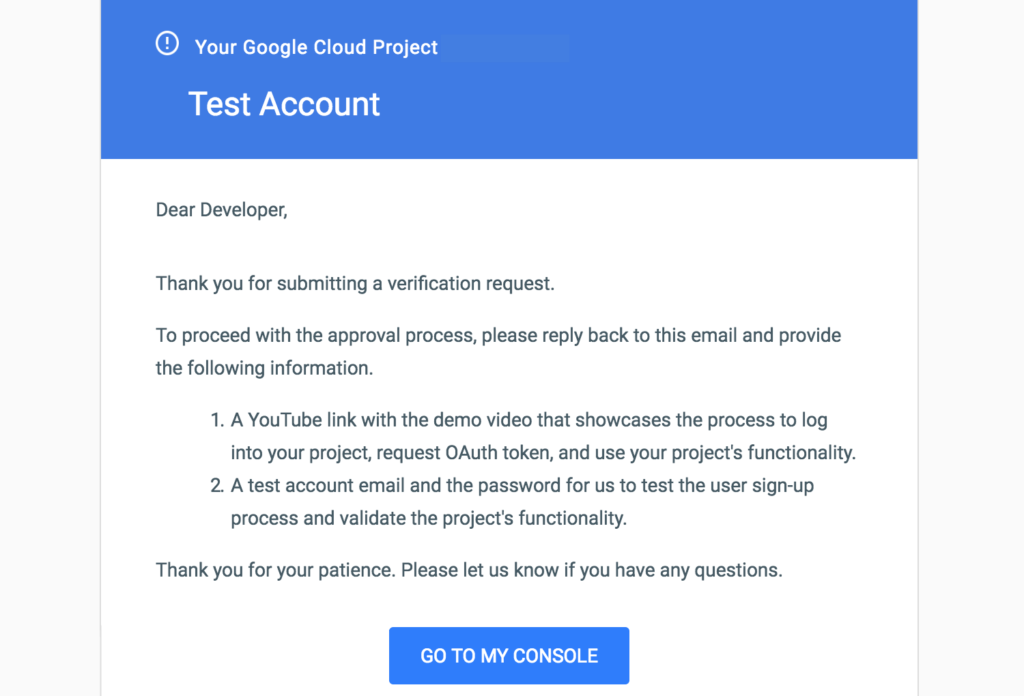
“Dear Developer, thank you for submitting a verification request. To proceed with the approval process…”
These are the fated words that we want to avoid hearing from Google after requesting OAuth verification for your app.
As Google OAuth policies have evolved I’ve personally helped hundreds of CloudSponge customers satisfy Google’s reviewers, so I figured I’d write it all down here in case it’s helpful for you too.
So, read on to learn about minimizing the number of back-and-forths required to verify your app.
Why am I getting this request?
Google made some changes to their OAuth verification interface recently for the better. They now explain the OAuth verification requirement inside your Google developer account. They have built the application process into their UI and they now show you the current verification status of your OAuth app.
As a result, developers are now better informed about the need to verify an OAuth app and how it appears broken to end-users before verification. And developers are more commonly now requesting a review before deploying the Google integration to production.
This is all great news, so far.
However, it creates a catch-22: how can they verify your application if it doesn’t yet exist on a live website? Oops!
To solve this, Google will often request that you create a screencast of your integration in your development environment. Their email vaguely requests a video that showcases the process to request an OAuth token.
Update: Google now requires your demo video to be made in your live production environment. You’ll need to enable the integration before it’s ready for public consumption.
What is an OAuth verification video, exactly?
Since the email from Google doesn’t spell out exactly what they want to see from developers, people rarely get it right the first time.
Their request email doesn’t tell us that part of the requirement is for you to show some very specific details about your OAuth consent flow, so I’ve described them here for you.
Be sure to include the points below to create a successful video for Google OAuth verification the first time and avoid the frustrating and time-consuming back-and-forth with their review team.
Be proud of your client_id
The OAuth consent flow often happens inside a new, smaller browser window that opens over the main window. Google’s reviewers want to see that the query string in the address bar contains your Google OAuth client ID. You will likely need to make the popup window wider so that the client_id is visible.
Just make the window bigger. I’m pretty sure you get bonus points for highlighting the client_id.
client_id in the URL.Don’t hide your ask
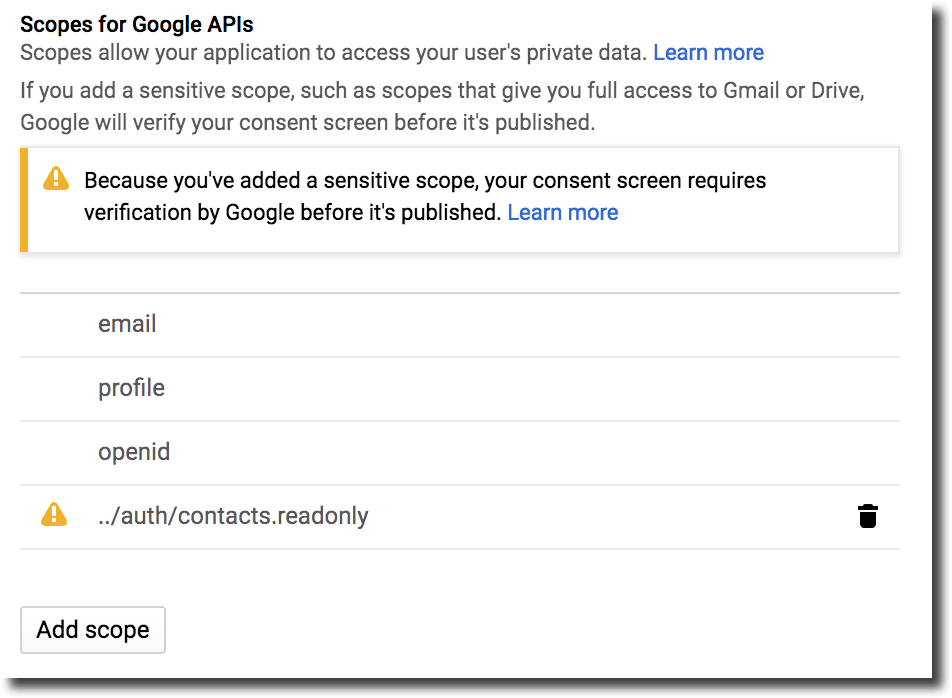
You must also be sure to show the consent request in the OAuth flow. This is the page where the user sees the scopes that you are requesting and clicks “Agree” to grant access. This step is a tricky one because usually a developer has already granted consent and Google’s UI will skip this page before showing the ask.
To fix this, you will revoke consent and wait for the permission change to propagate to Google’s servers before recording your screen capture.
To ensure that the OAuth consent screen shows up:
- Sign in to your Google account,
- Visit https://myaccount.google.com/permissions,
- Click “Remove Access” on the permission for your site,
- Wait a minute, just to be sure that the updated permission has a chance to propagate to Google’s servers and
- Finally, re-record your screencast.
The finished product
Here’s a demonstration of the complete OAuth flow. Notice the OAuth consent page has a blue “Allow” button. If your screen capture doesn’t have this page, Google will ask you to redo your video.
Did I miss something?
If Google still hassles you about your screencast, let me know! As their process has been evolving, I’ve assisted many people in getting their OAuth apps approved. I’ve seen most of the pitfalls and I’m happy to learn about the latest issues that developers are facing.
Do you want to see how CloudSponge could help you add address book importing to your recipient list creation interface
Our sharing optimisations bring double the number of leads for our clients each month.
Try for yourself and find out what you're missing
(it's quick, easy and absolutely free!)