Google OAuth is tricky to get right. We understand the frustrations, we’ve helped 100’s of customers through the process. That’s why you should consider this recommended step when setting up your Google OAuth.
Adding us to your Google OAuth project lets us review your settings directly so there’s no confusion in communicating the differences between an Authorized Redirect URI and an Authorized JavaScript Origin (hint: ignore the Javascript origins).
After you add us, we’ll do a quick review of your settings and point out anything that needs to be completed or corrected for your integration. We’ll also let you know if there is anything obvious that Google will push back on for your verification, saving you time and frustration when dealing with Google’s verification workflow.
Don’t worry, we never make any changes to your project without clearing them with you first.
After you add us, also let us know at support@cloudsponge.com and we’ll review your project before you submit it for verification.
Here’s how to add CloudSponge as a project owner
- Using the navigation menu at the top left, select IAM & Admin > IAM.
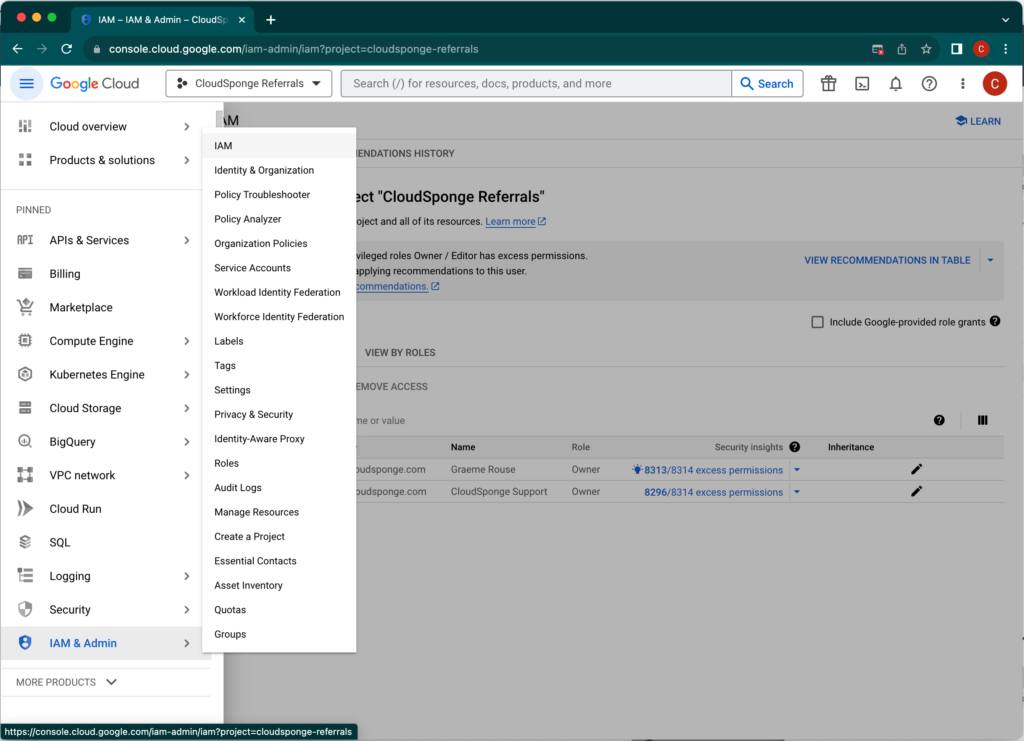
Open the IAM page for your Google project. - Click GRANT ACCESS
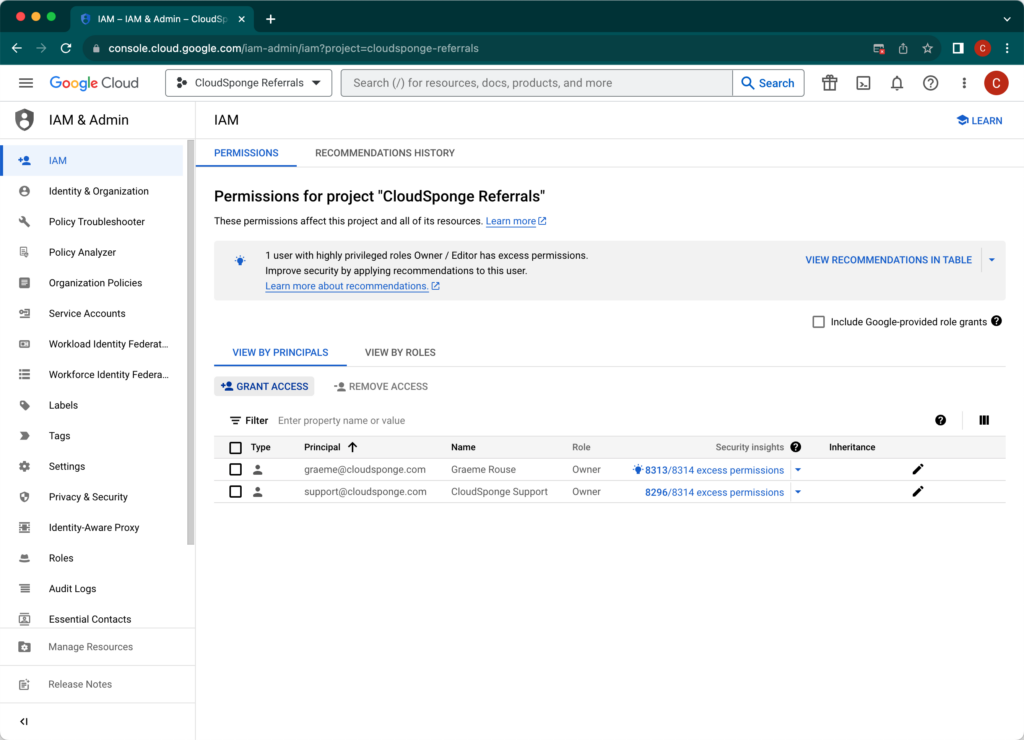

Click “GRANT ACCESS” on the Google IAM screen - Add support@cloudsponge.com as a Project > Owner as shown and click Save.
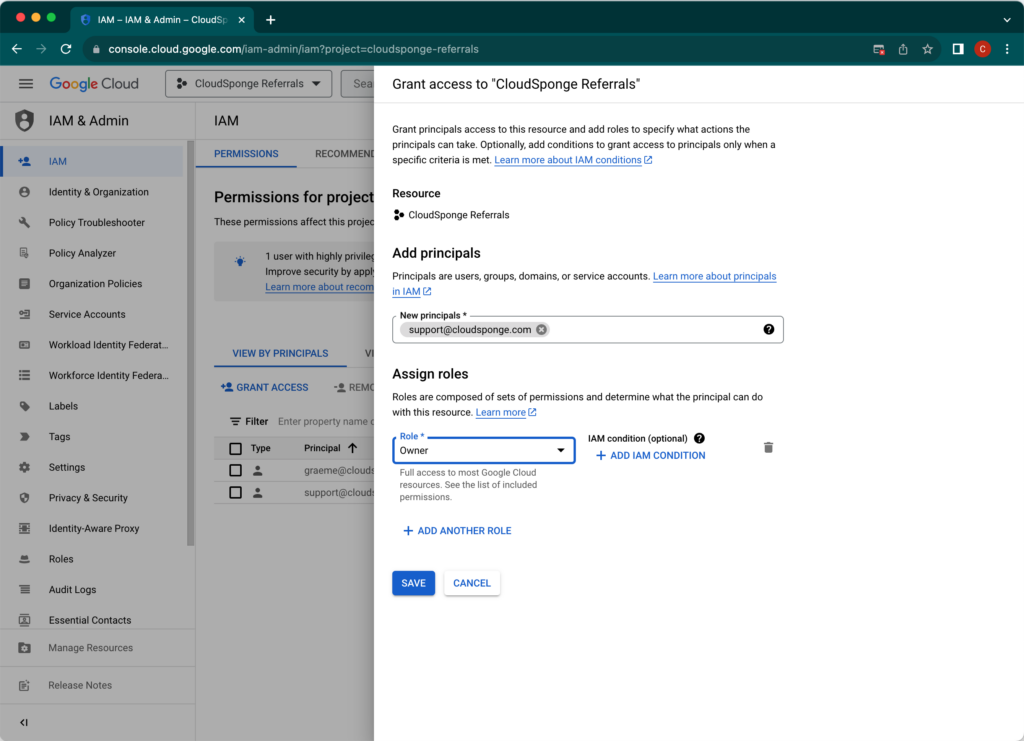

Adding support@cloudsponge.com as a project owner
Send us an email to let us know that you’ve just added us to your project and we will review it as soon as we can.
And you are done!